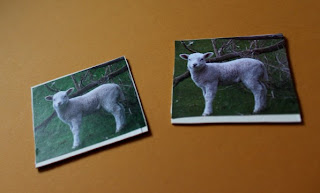
Memo cards are a great combination of a lot of fun and development of concentration and focus - two qualities that many seniors lack of today. They are positive and should be developed from childhood. Buying MEMO cards does not require much effort - they are offered in a great variety in the markets - from simple pictures to those with the most detailed and varied, including favorite characters and objects. However, I suggest you take this challenge with your children and make their own MEMO cards. Besides it's a great deal of fun, it develops manual dexterity, ability to work in a team and last but not least - the belief in own abilities - "It's in the shop, but I can do it myself!"
Necessary tools:
Cardboard / mount
pencil
Line or meter
penknife
Several A4 sheets and color printer
glue
Step № 1
A very important step. Decide in advance how many cards MEMO will create and what size. This will be essential when buying material and if not done, it is likely that the material does not reach you. Well, is not fatal, but it will cost you another kicking to the bookstore, and time is precious, so you'd better save it as not to miss this step / you probably clear that stress so much on it, because I might very miss often decide to decide on the spot, with the result that often suffer /
Step № 2
Choose a thick cardboard. The thicker - the better, because when the cards are played much / but we do them for this purpose / better not be easily torn or wrinkled. My suggestion is to take the mount - solid and comfortable, and you can choose between different color for the back. For those who like me are not very aware of what is mount - it's a color solid board that is used to hooped picture or drawing into the box between the creation itself and the physical frame. The case, however, is very suitable for MEMO cards, so go you can use it. Passepartout is sold in more specialized bookstores, stationery and art materials. Before heading there though, do not miss the step number one. And your calculations it. Mount in a variety of sizes, choose the one that will fit the maximum number and size cards that will create. The approximate cost of a mount size 40/60 is 5 lev. With it you can create 35 square cards size of the country - 7 cm You can make cards and smaller, but note that in a country of less than 5 cm, the images will also become very small.
Step № 3
Boldly marking your mount from his white, netsvetna side, the other will serve as a spine of MEMO maps - her choose a favorite color. I chose two pieces mount - one yellow and one green. Inscribed in pencil your cards and grab the nearest sharp mock knife. Let the task of cutting the small individual cards from the big cardboard be entrusted to a useful and accurate and netrepereshta hand. You need to get cute cards.
Step № 4
Find your pictures around the internet. This is the creative part and a lot depends on what you want to watch, and why not learn. You may have images of famous buildings in the world - the Eiffel Tower, Pisa, Hotel in Dubai, Empire State Building, may have different locations around the planet could have car models, and why not faces of people - remembering different details of individuals will make better physiognomist. In my case, I wanted to know the animals on the planet. Of course, this is quite a challenging task, which need hundreds of cards, so I was limited to the class Mammalia, besides the most famous. Find images on the web / who can - let alone make them and get them out as photo / save them to your computer and place them in a word file in which you can make them any size as to match the dimensions of your MEMO cards. The final task of this step will do it the closest color printer. Remember - each image by two.
Step № 5
For the last step you need an additional tool - glue. Cards you have finished, you have the pictures, just stick them to wait a little patience. And the game can begin!
In addition, you can create cards for their beautiful box using a small cardboard box which is covered with colored paper.

No comments:
Post a Comment